JTS TX16H ручной микрофон отдельный без приемника частота 782-806 МГц для - купить по
13823.56


Сохраните в закладки:


*История изменения цены! Указанная стоимость возможно, уже изменилось. Проверить текущую цену - >
| Месяц | Минимальная цена | Макс. стоимость | Цена |
|---|---|---|---|
| Aug-16-2025 | 5104.55 руб. | 5206.81 руб. | 5155 руб. |
| Jul-16-2025 | 4140.53 руб. | 4223.70 руб. | 4181.5 руб. |
| Jun-16-2025 | 5024.1 руб. | 5124.19 руб. | 5074 руб. |
| May-16-2025 | 4984.53 руб. | 5084.60 руб. | 5034 руб. |
| Apr-16-2025 | 3979.9 руб. | 4059.61 руб. | 4019 руб. |
| Mar-16-2025 | 4903.35 руб. | 5001.7 руб. | 4952 руб. |
| Feb-16-2025 | 4863.81 руб. | 4960.3 руб. | 4911.5 руб. |
| Jan-16-2025 | 4823.32 руб. | 4919.95 руб. | 4871 руб. |
Новые товары
Характеристики
Описание товара
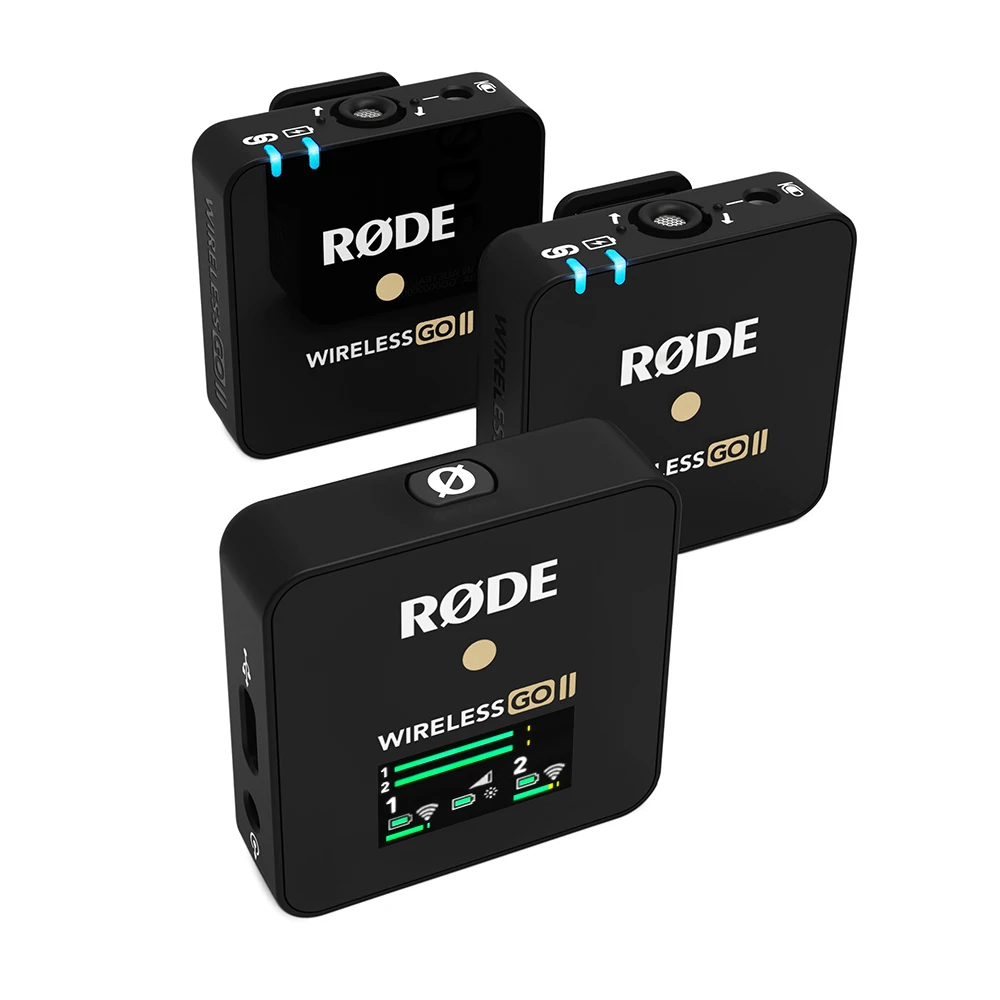
Rode Wireless Go II GO2 Single Wireless Lavalier Dual Channel Mic RX 2TX Transmission Professional Microphone for Phone DSLR Cameras
Buyer Picture:

Features:
Record two sound sources simultaneously with a dual channel wireless microphone system
Total wireless freedom with up to 200m 2.4GHz digital transmission range
Extremely secure operation with 128-bit encryption
Universally compatible with any camera, mobile device, or computer that accepts 3.5mm analog TRS, USB-C, and iOS digital audio output
Capture over 24 hours of audio straight to each transmitter
On-board recording capability ensures dropouts and audio issues won’t get in the way
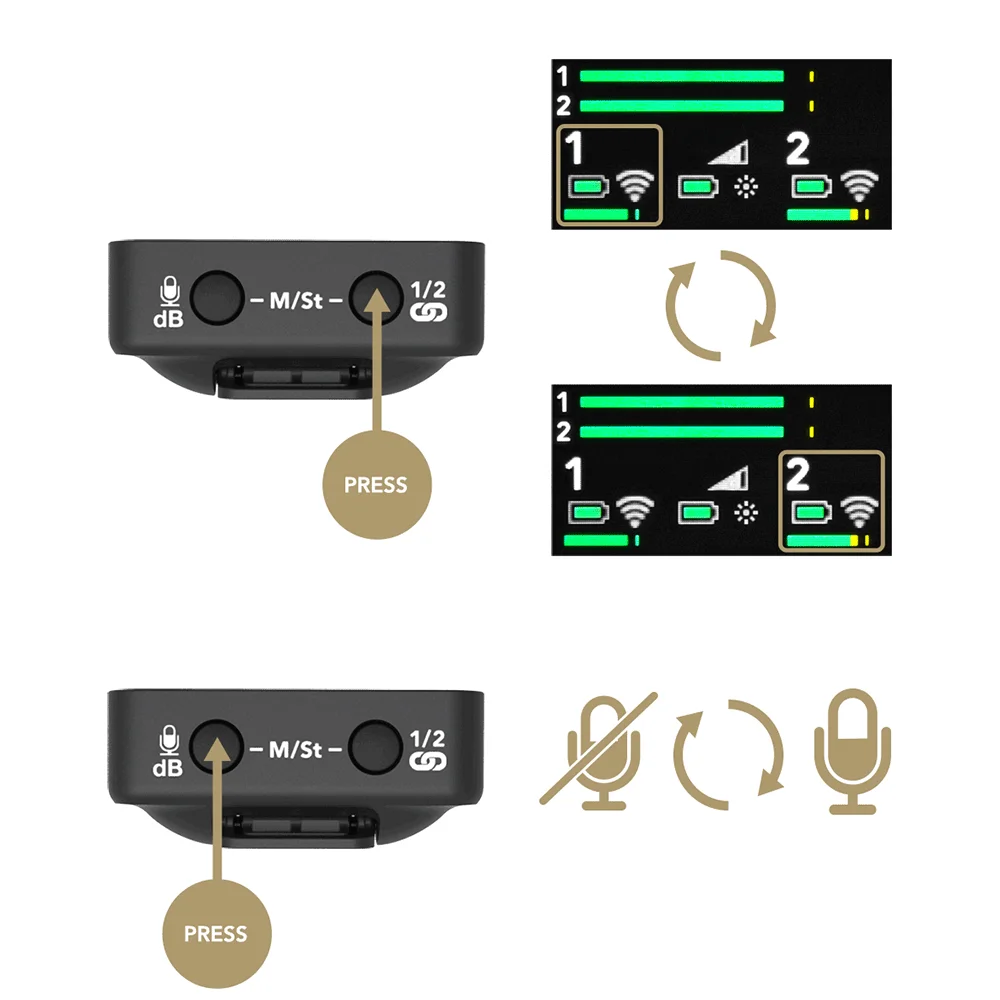
Highly flexible with the ability to switch between mono and stereo recording modes
Get the clearest signal possible with a three-stage attenuation pad (expandable to 10-stage pad)
Ensures maximum quality, even if your audio distorts - captures a backup recording to a separate -20dB channel
Total control of every feature via the RODE Central app
Up to 7 hours battery life thanks to a powerful built-in lithium ion battery
Suitable for long recording sessions with a power saver mode
Completely cable free
Small, lightweight, and perfect for mobile recording applications
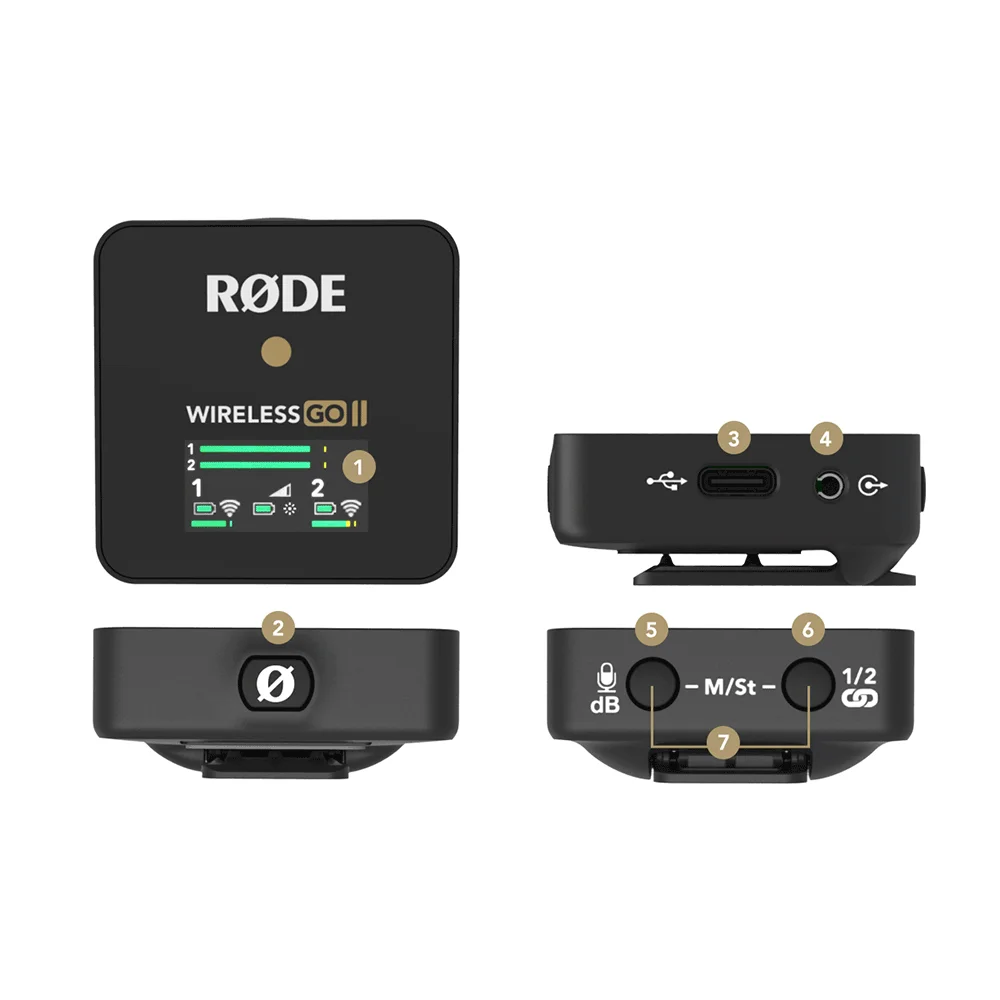
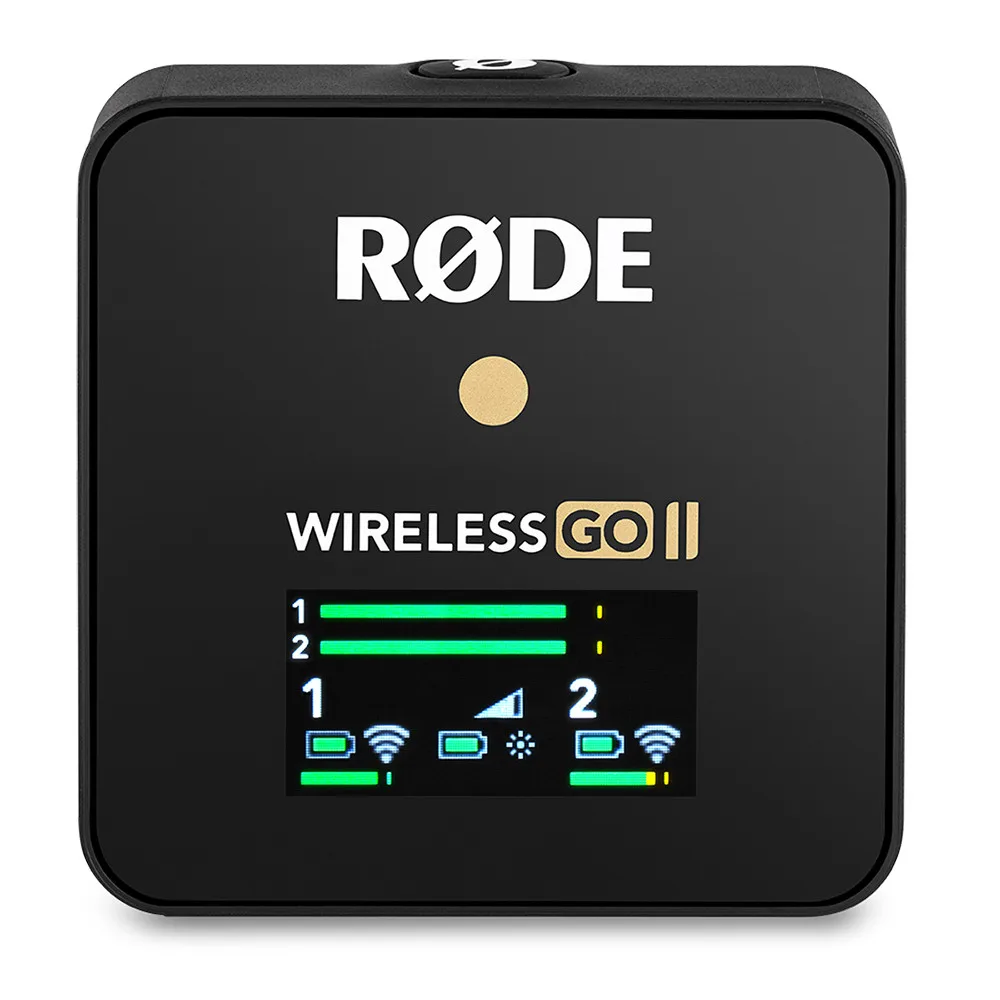
Receiver:
1: LED screen
2: Power button
3: USB-C connector
4: 3.5mm TRS output
5: Gain control/mute button
6: Pairing button
7: Mono/stereo mode selector
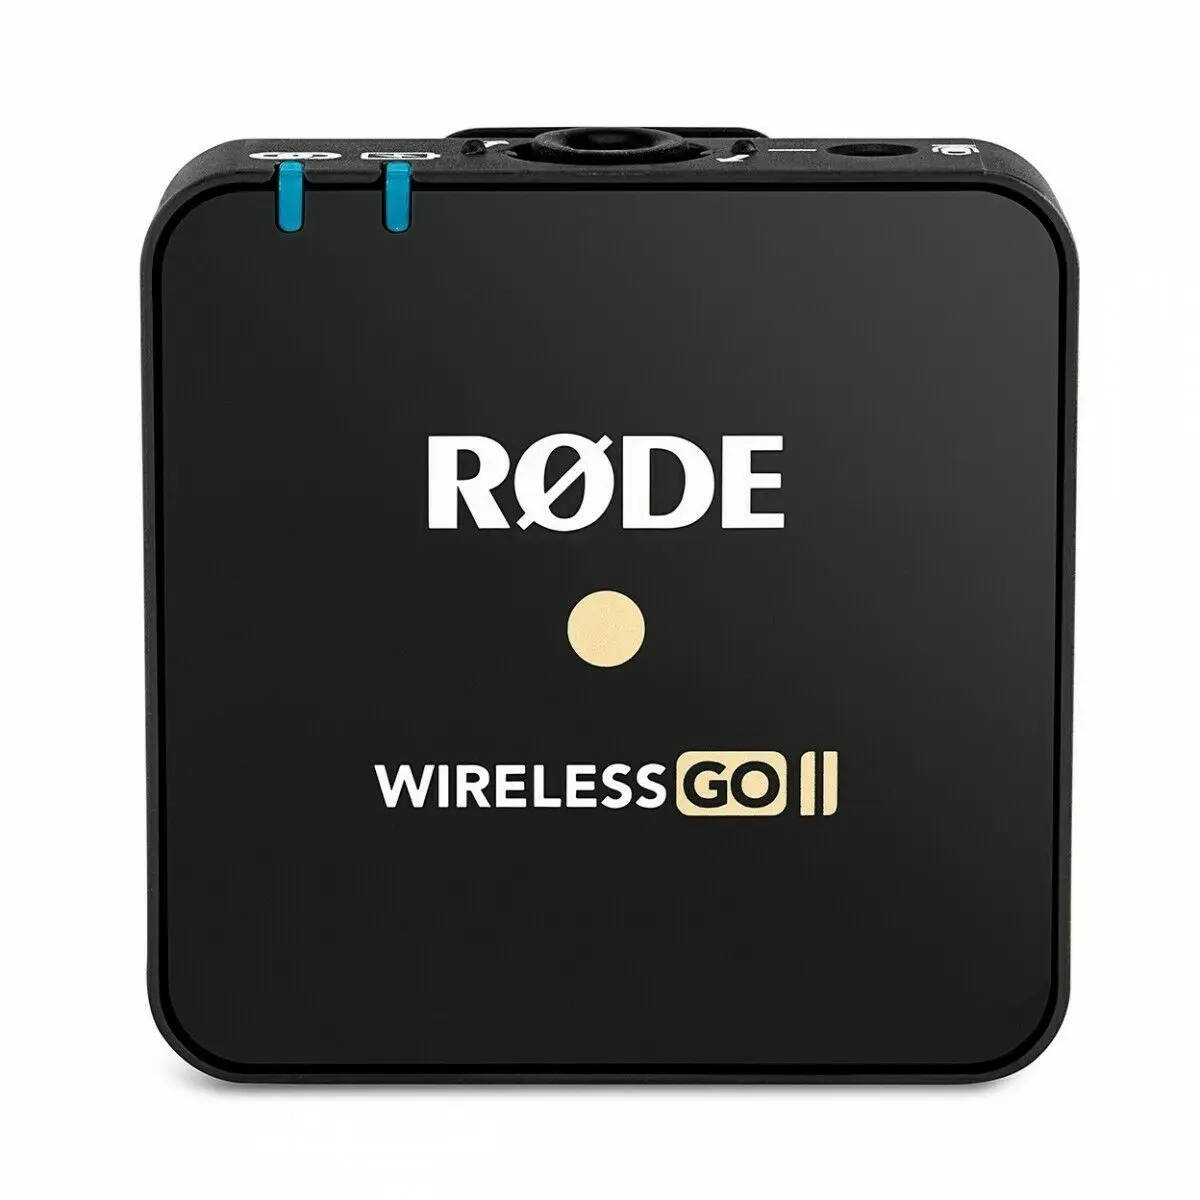
Transmitter:
1: USB-C connector
2: Power button
3: 3.5 mm TRS input
4: Built-in microphone
5: Battery indicator LED
6: Connectivity indicator LED
Product List (Wireless Go II ):
2 x TX
1 x RX
1 x SC5 cable
3 x (SC20) USB-C cable
1 x Storage bag
3 x Furry Windshields
Product List (Wireless Go II with Chager Box ):
2 x TX
1 x RX
1 x SC5 cable
3 x (SC20) USB-C cable
1 x Storage bag
3 x Furry Windshields
1 xChager Box
Product List( Chager Box):
1x Chager Box
Product List (Wireless Go II Single):
Rode Wireless GO II Single Compact Digital Wireless Microphone System/Recorder (2.4 GHz, Black)
Clip-On Transmitter
Dual-Channel Wireless Receiver
3 x SC20 USB Type-A to USB Type-C Cable
SC5 3.5mm TRS Memory Cable
3 x Furry Windshield
Carry Pouch


Q.Will the Smartlav+ (or any other TRRS connection) work with the Wireless GO II?
A.The VideoMic GO II runs off plug-in power supplied by the connected device and does not contain an internal battery, so it does not need to be charged.
Q.Can I use the VideoMic GO II as a USB microphone?
A.Most definitely! The VideoMic GO II features a USB-C audio output that allows it to be connected to computers and mobile devices and used as a fully featured USB microphone. When used in USB mode, the 3.5mm TRS output can be used to connect headphones for audio monitoring and playback.
Additional cables are required for connecting the VideoMic GO II to computers and mobile devices via USB, such as the RØDE SC16, SC17or SC18 for devices with a USB-C input, or RØDE SC15, SC19for iOS devices with a Lightning port (note: to use the VideoMic GO II with an iOS device, you must use an Apple-certified 'Lightning Accessory Cable' like the SC15 or SC19).
Q.Why do I need to use a RØDE cable to connect the VideoMic GO II to my iOS device?
A.It is important to understand there are two different types of USB to Lightning cables specified by Apple. One is a charging / sync cable. This is the one that is supplied with your phone. The other is a ‘Lightning Accessory Cable’. This is a different type of cable that is used to attach accessories (such as microphones) to your device. You can use any Apple-certified Lightning Accessory Cable to connect the VideoMic Go II to your device; it does not have to be from RØDE. Just check carefully to ensure it is a certified ‘Lightning Accessory Cable’. A regular charging / sync cable will not work, as it is a different type of cable.
Q.Can I use the pad function when using the 3.5mm analog output?
A.The pad function only operates when using the VideoMic GO II in USB mode. When using the 3.5mm analog output, you should use the gain control on your camera to ensure the recording level is not too high.
Q.Can I use an extension cable when mounting the mic on a boom?
A.Yes. If you are using the 3.5mm output, you can use any high-quality 3.5mm extension cable (but be aware that the longer the cable, the higher likelihood of interference from other electrical devices). We suggest using the RØDE VC1 or SC8 when mounting the VideoMic GO II on a boompole. You can also use the Wireless GO for a wireless solution.
If you are using the USB output, be aware that very long USB cables or USB cable extenders can be problematic, and their performance may depend on the recording device being used. Use a high-quality USB extender, ideally an ‘active’ one, for best performance. Note: RØDE cannot warrant the performance of the microphone when used with third-party cables.
Q.Why does the Level Peak Warning LED only work in USB mode?
A.When using the 3.5mm analog output, the peaks will depend on the gain setting in your camera, so you should use the audio meters on your device to monitor for peaks.
In USB mode, the VideoMic Go II utilises an internal preamp and A/D, so the LED will alert you to any loud peaks that may clip the input.
Q.Why does the supplied shockmount have a sliding rail?
A.The sliding rail is particularly useful for making sure the VideoMic GO II doesn’t protrude within the frame when using a very wide/ultra-wide lens and also allows it to be pushed forward in case it is blocking the viewfinder of a camera.
Q.Can I mount the VideoMic GO II onto a boom arm, boompole, tripod or microphone stand?
A.Yes, on the bottom of the VideoMic GO II’s cold shoe mount there is a 3/8” screw thread, allowing it to be mounted to boom arms such as the RØDE PSA1 and PSA1+, boompoles, tripods such as the Tripod 2, and microphone stands. You may need a thread adaptor to attach it to these accessories (we recommend the RØDE Thread Adaptor kit).
Q.How do I connect the VideoMic GO II to smartphone or tablet?
A.If you have an iPhone or iPad with a Lightning input, you will need a Lightning Accessory Cable (USB-C to Lightning) like the RØDE SC15or SC19(note: standard USB-C to Lightning cables will not work – you must use an Apple-certified ‘Lightning Accessory Cable’).
If you have a device with a USB-C input, such as an Android smartphone or iPad Pro, you will need a USB-C to USB-C cable like the RØDE SC16 or SC17.
You can also plug your VideoMic GO II into your smartphone or tablet using the 3.5mm output with the RØDE SC7 cable (available separately). Using the USB-C output gives you access to a host of features including headphone monitoring and access to advanced features using RØDE Central, so we highly recommend this option if possible
Q.Can I adjust the VideoMic GO II’s settings?
A.When being used with a camera, the VideoMic GO II is designed to be a simple plug-and-go microphone with no controls or switches ensuring minimal fuss. You can use the manual gain control on your camera to adjust the input level if required.
When being used in USB mode, the input level and headphone volume can be adjusted from the computer or mobile device it’s connected to or with RØDE Central or RØDE Connect (computers), RØDE Central Mobile or RØDE Reporter (mobile devices). These apps can also be used to activate the high-pass filter, high-frequency boost, pad and other audio processing (RØDE Connect only).
Q.When connected to my camera, the audio levels jump up and down when recording. Why is this?
A.Many cameras have Automatic Gain Control (AGC) and other audio processing enabled by default. They can cause jumps in audio levels and other artefacts. These are not needed when using a high-quality microphone such as the VideoMic GO II. Ensure they are turned off, and the audio gain is set to ‘manual’ in your camera settings. Then adjust the gain so the audio meter is about 2/3 of the way across for the sound you are recording. For more details on setting the gain on your camera, check out this blog.
121426

Подала заявку на сайте на заказ постельного белья цвета шампанского. В этот же день начали исполнять мой индивидуальный заказ. Через... Читать отзыв полностью...

Довольно долго выбирал подарок моему маленькому внуку на Новый год до данной модели гоночного вагона. Остановил выбор именно на ней.... Читать отзыв полностью...

Для моего ультрабука Hp Pavilion 15.6 дюймового эта сумка хорошо подошла. Мне понравилось качество сумки, можно туда же положить зарядку... Читать отзыв полностью...

Купила детский вязанный свитер для своей малышки. Свитер яркий и несмотря на то, что осенний, теплый, приятный на ощупь,... Читать отзыв полностью...

Чудесный пресс. Изготовлен из аллюминия, есть антипригарное покрытие, в использовании приспособление очень простое тоже. Для приготовления котлет я использую пищевую... Читать отзыв полностью...

Минималистический дизайн наряду с удобностью часов дают отличное сочетание, купил недавно, однако чёрный вариант советую больше белого. Ремень часов при... Читать отзыв полностью...


Шкбку из натуральной овчины заказывала для себя. Доставили оперативно, как раз успели дл зимних холодов. Шуба легкая, качественно пошитая. На... Читать отзыв полностью...