
10 шт. золотистая серебряная настенная угловая защитная наклейка L-образная
888

Сохраните в закладки:


*История изменения цены! Указанная стоимость возможно, уже изменилось. Проверить текущую цену - >
| Месяц | Минимальная цена | Макс. стоимость | Цена |
|---|---|---|---|
| Aug-18-2025 | 5795.6 руб. | 5911.65 руб. | 5853 руб. |
| Jul-18-2025 | 4700.22 руб. | 4794.8 руб. | 4747 руб. |
| Jun-18-2025 | 5704.1 руб. | 5818.94 руб. | 5761 руб. |
| May-18-2025 | 5658.59 руб. | 5771.87 руб. | 5714.5 руб. |
| Apr-18-2025 | 4517.60 руб. | 4607.20 руб. | 4562 руб. |
| Mar-18-2025 | 5567.85 руб. | 5678.14 руб. | 5622.5 руб. |
| Feb-18-2025 | 5521.3 руб. | 5631.21 руб. | 5576 руб. |
| Jan-18-2025 | 5476.54 руб. | 5586.79 руб. | 5531 руб. |
Новые товары
Характеристики
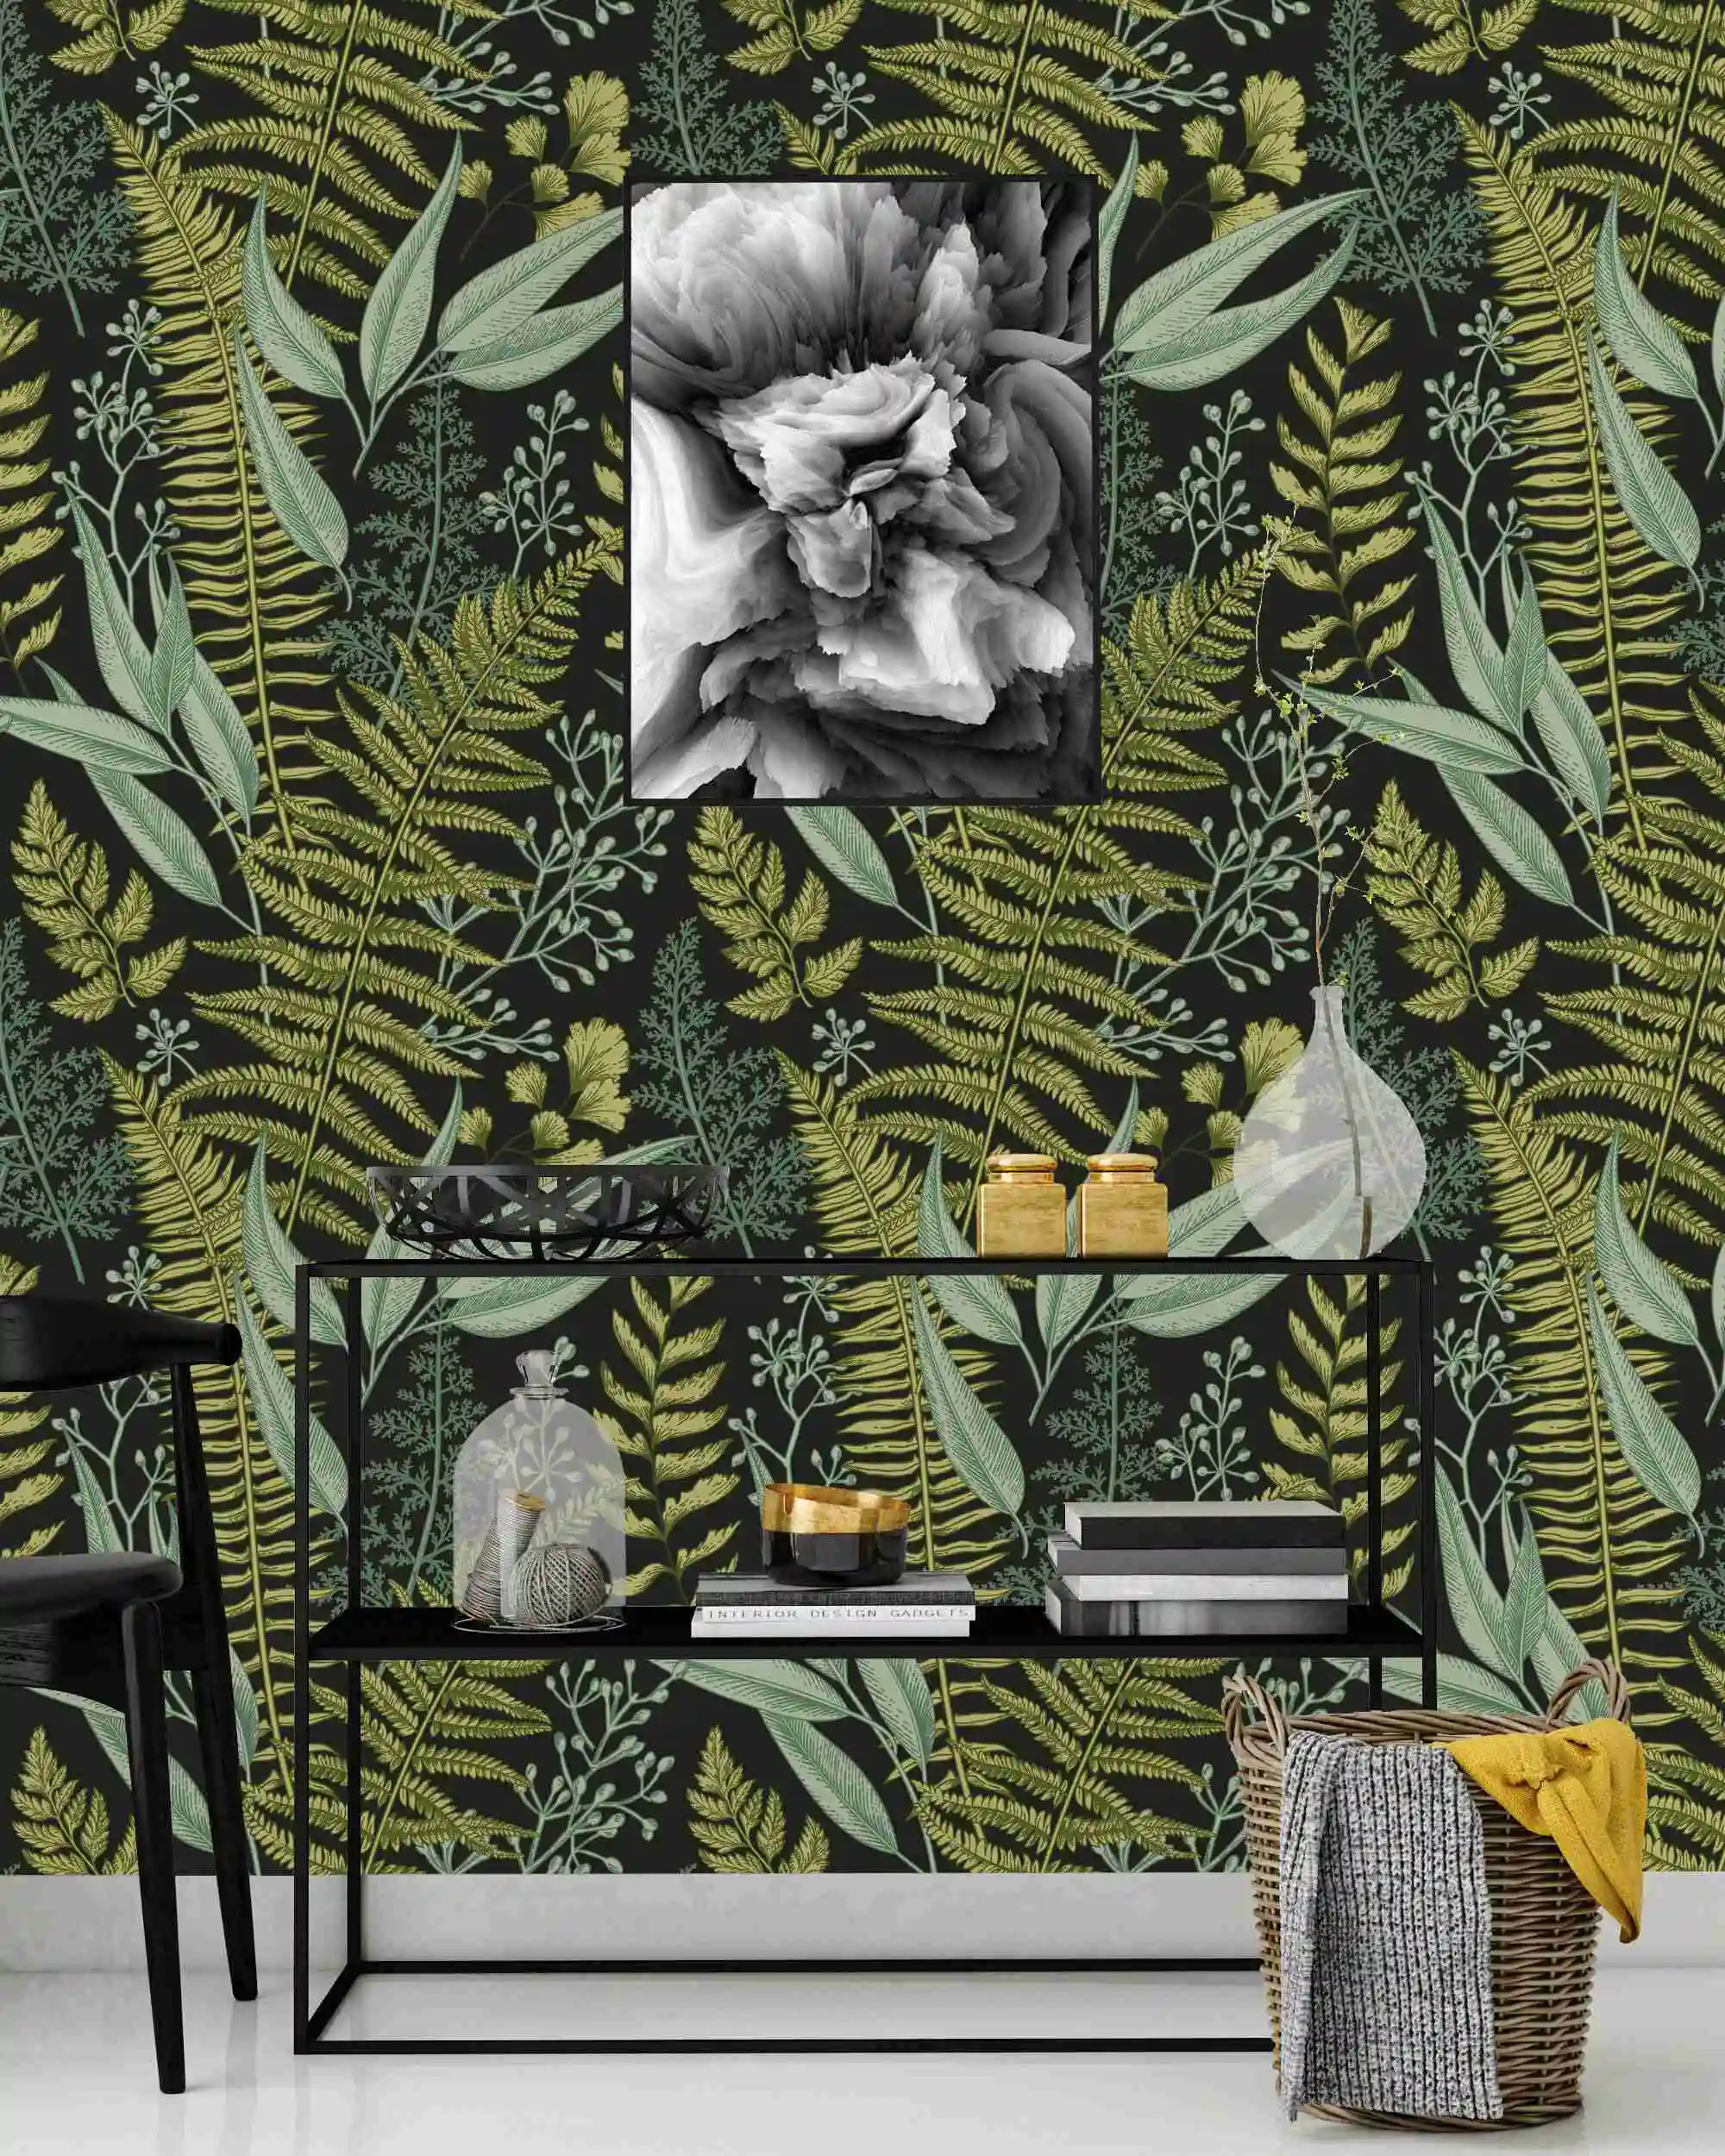
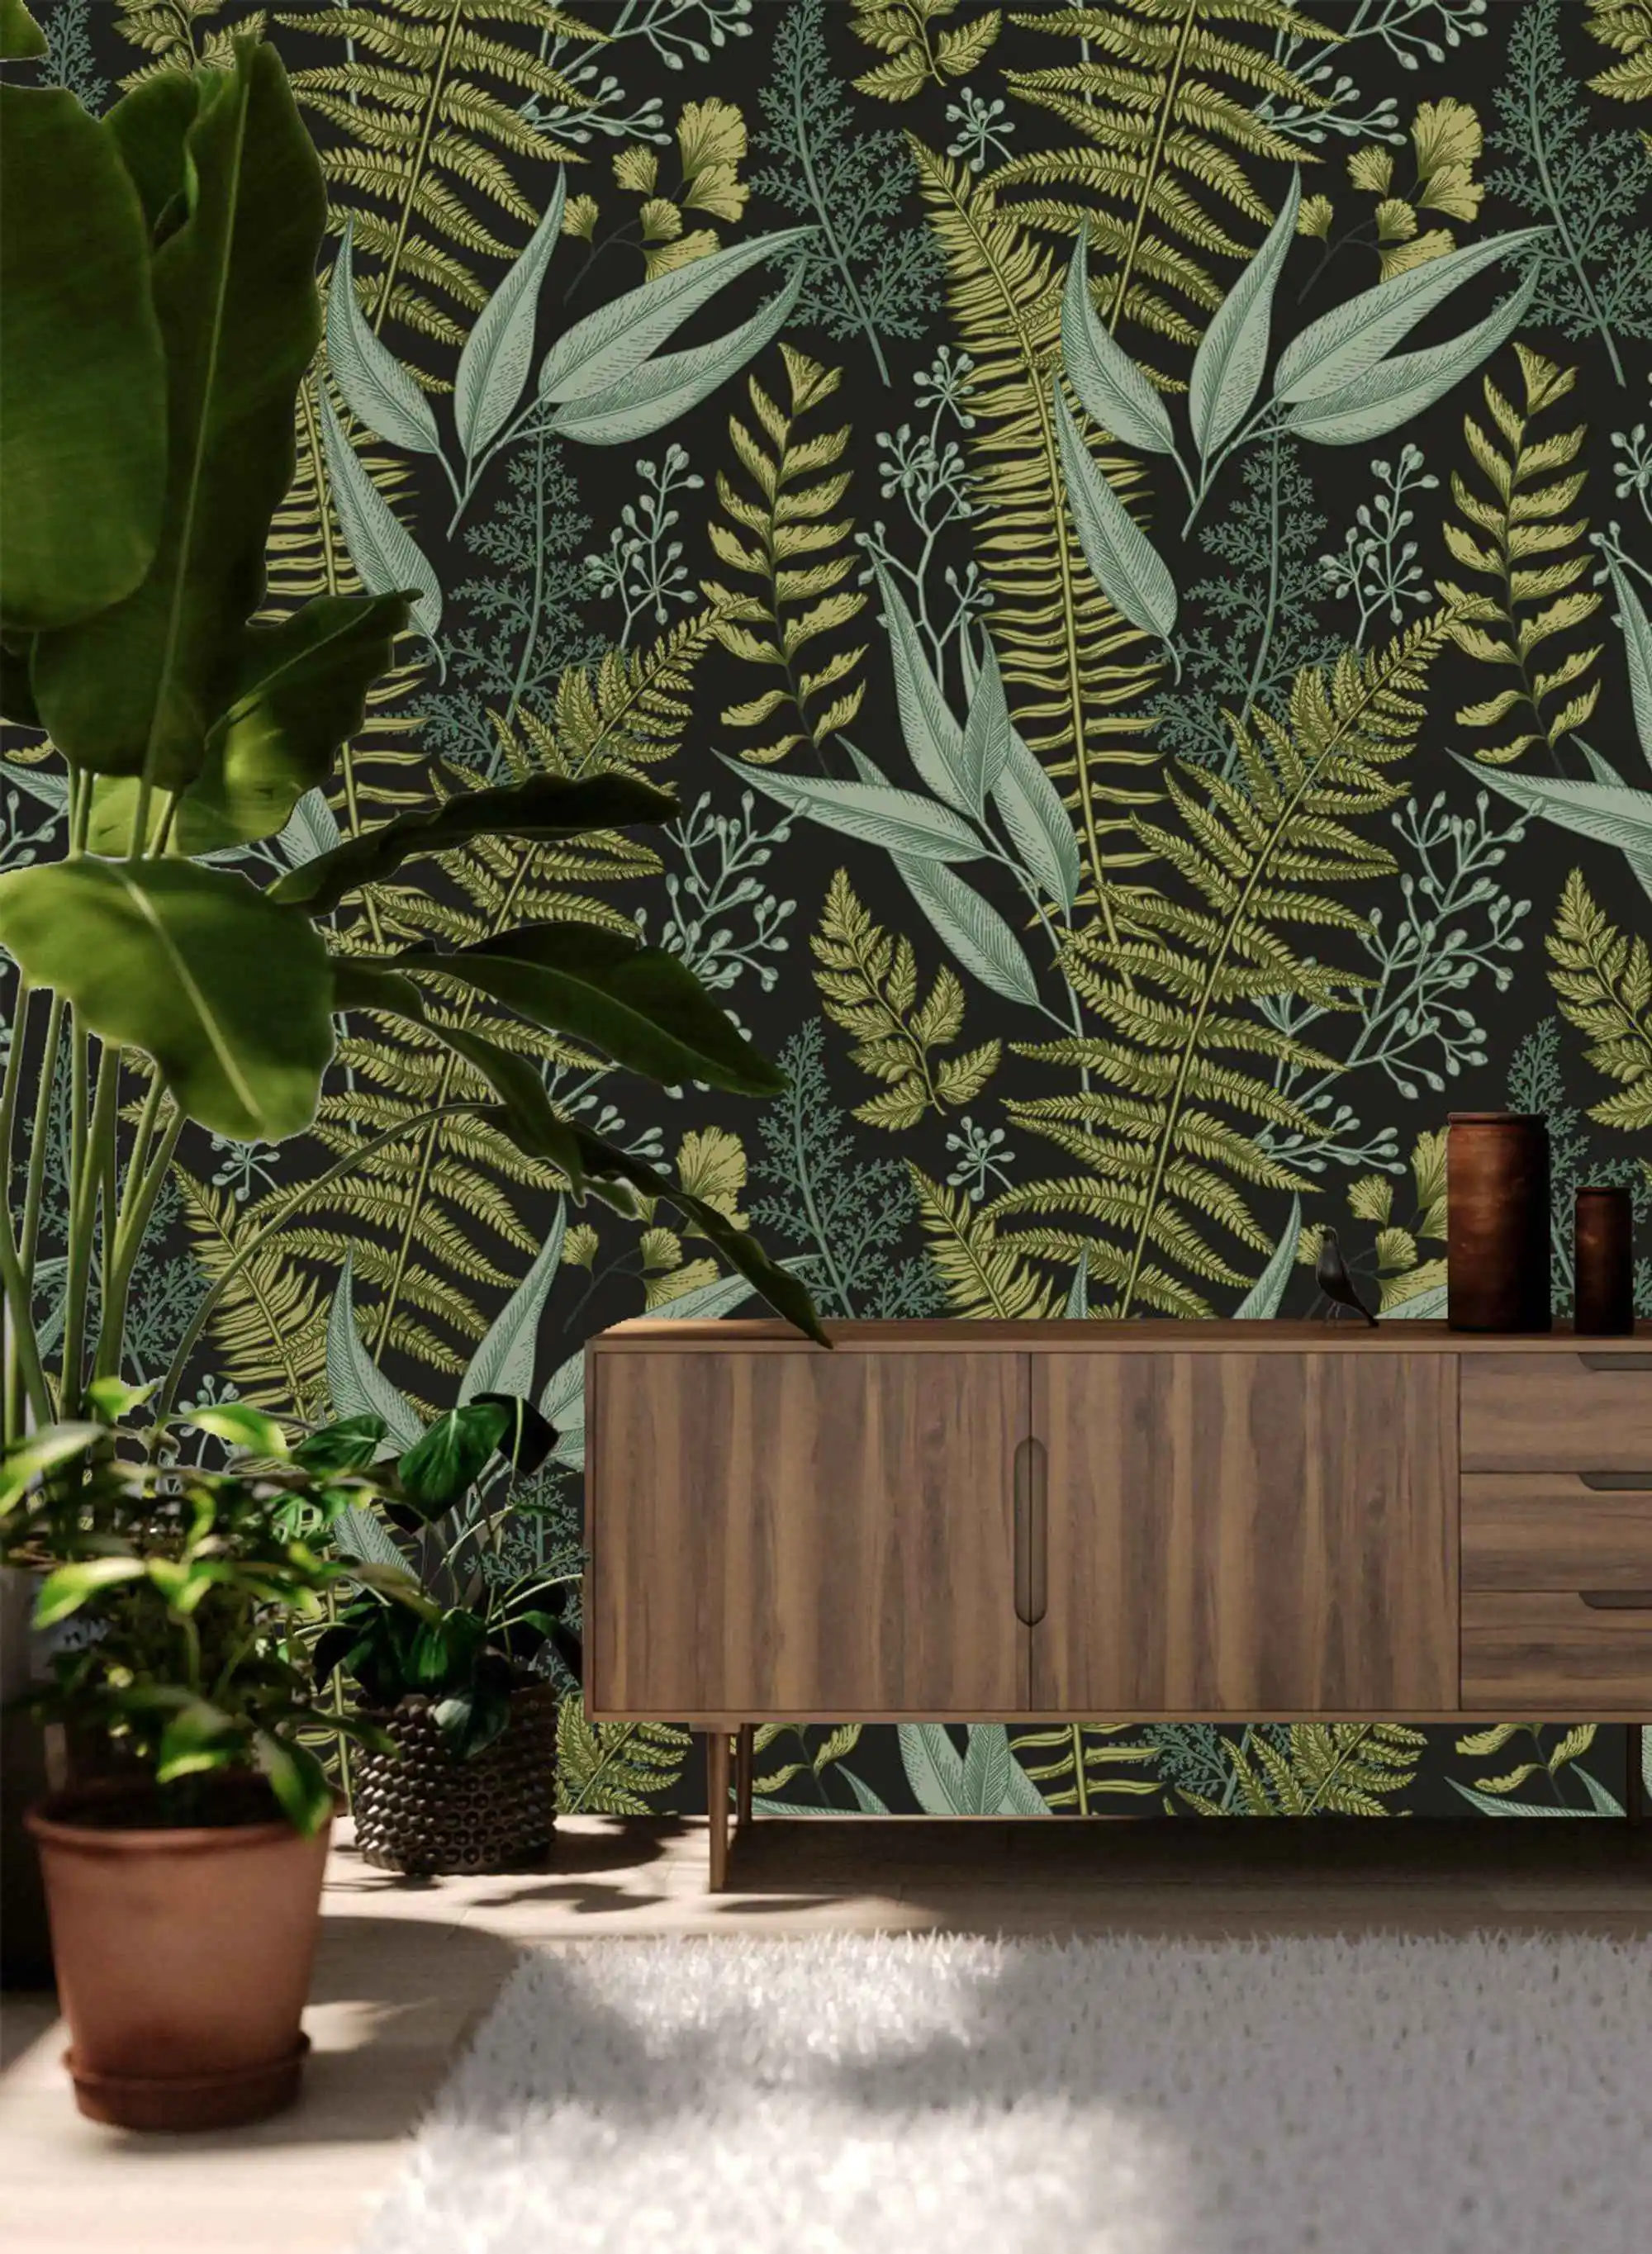
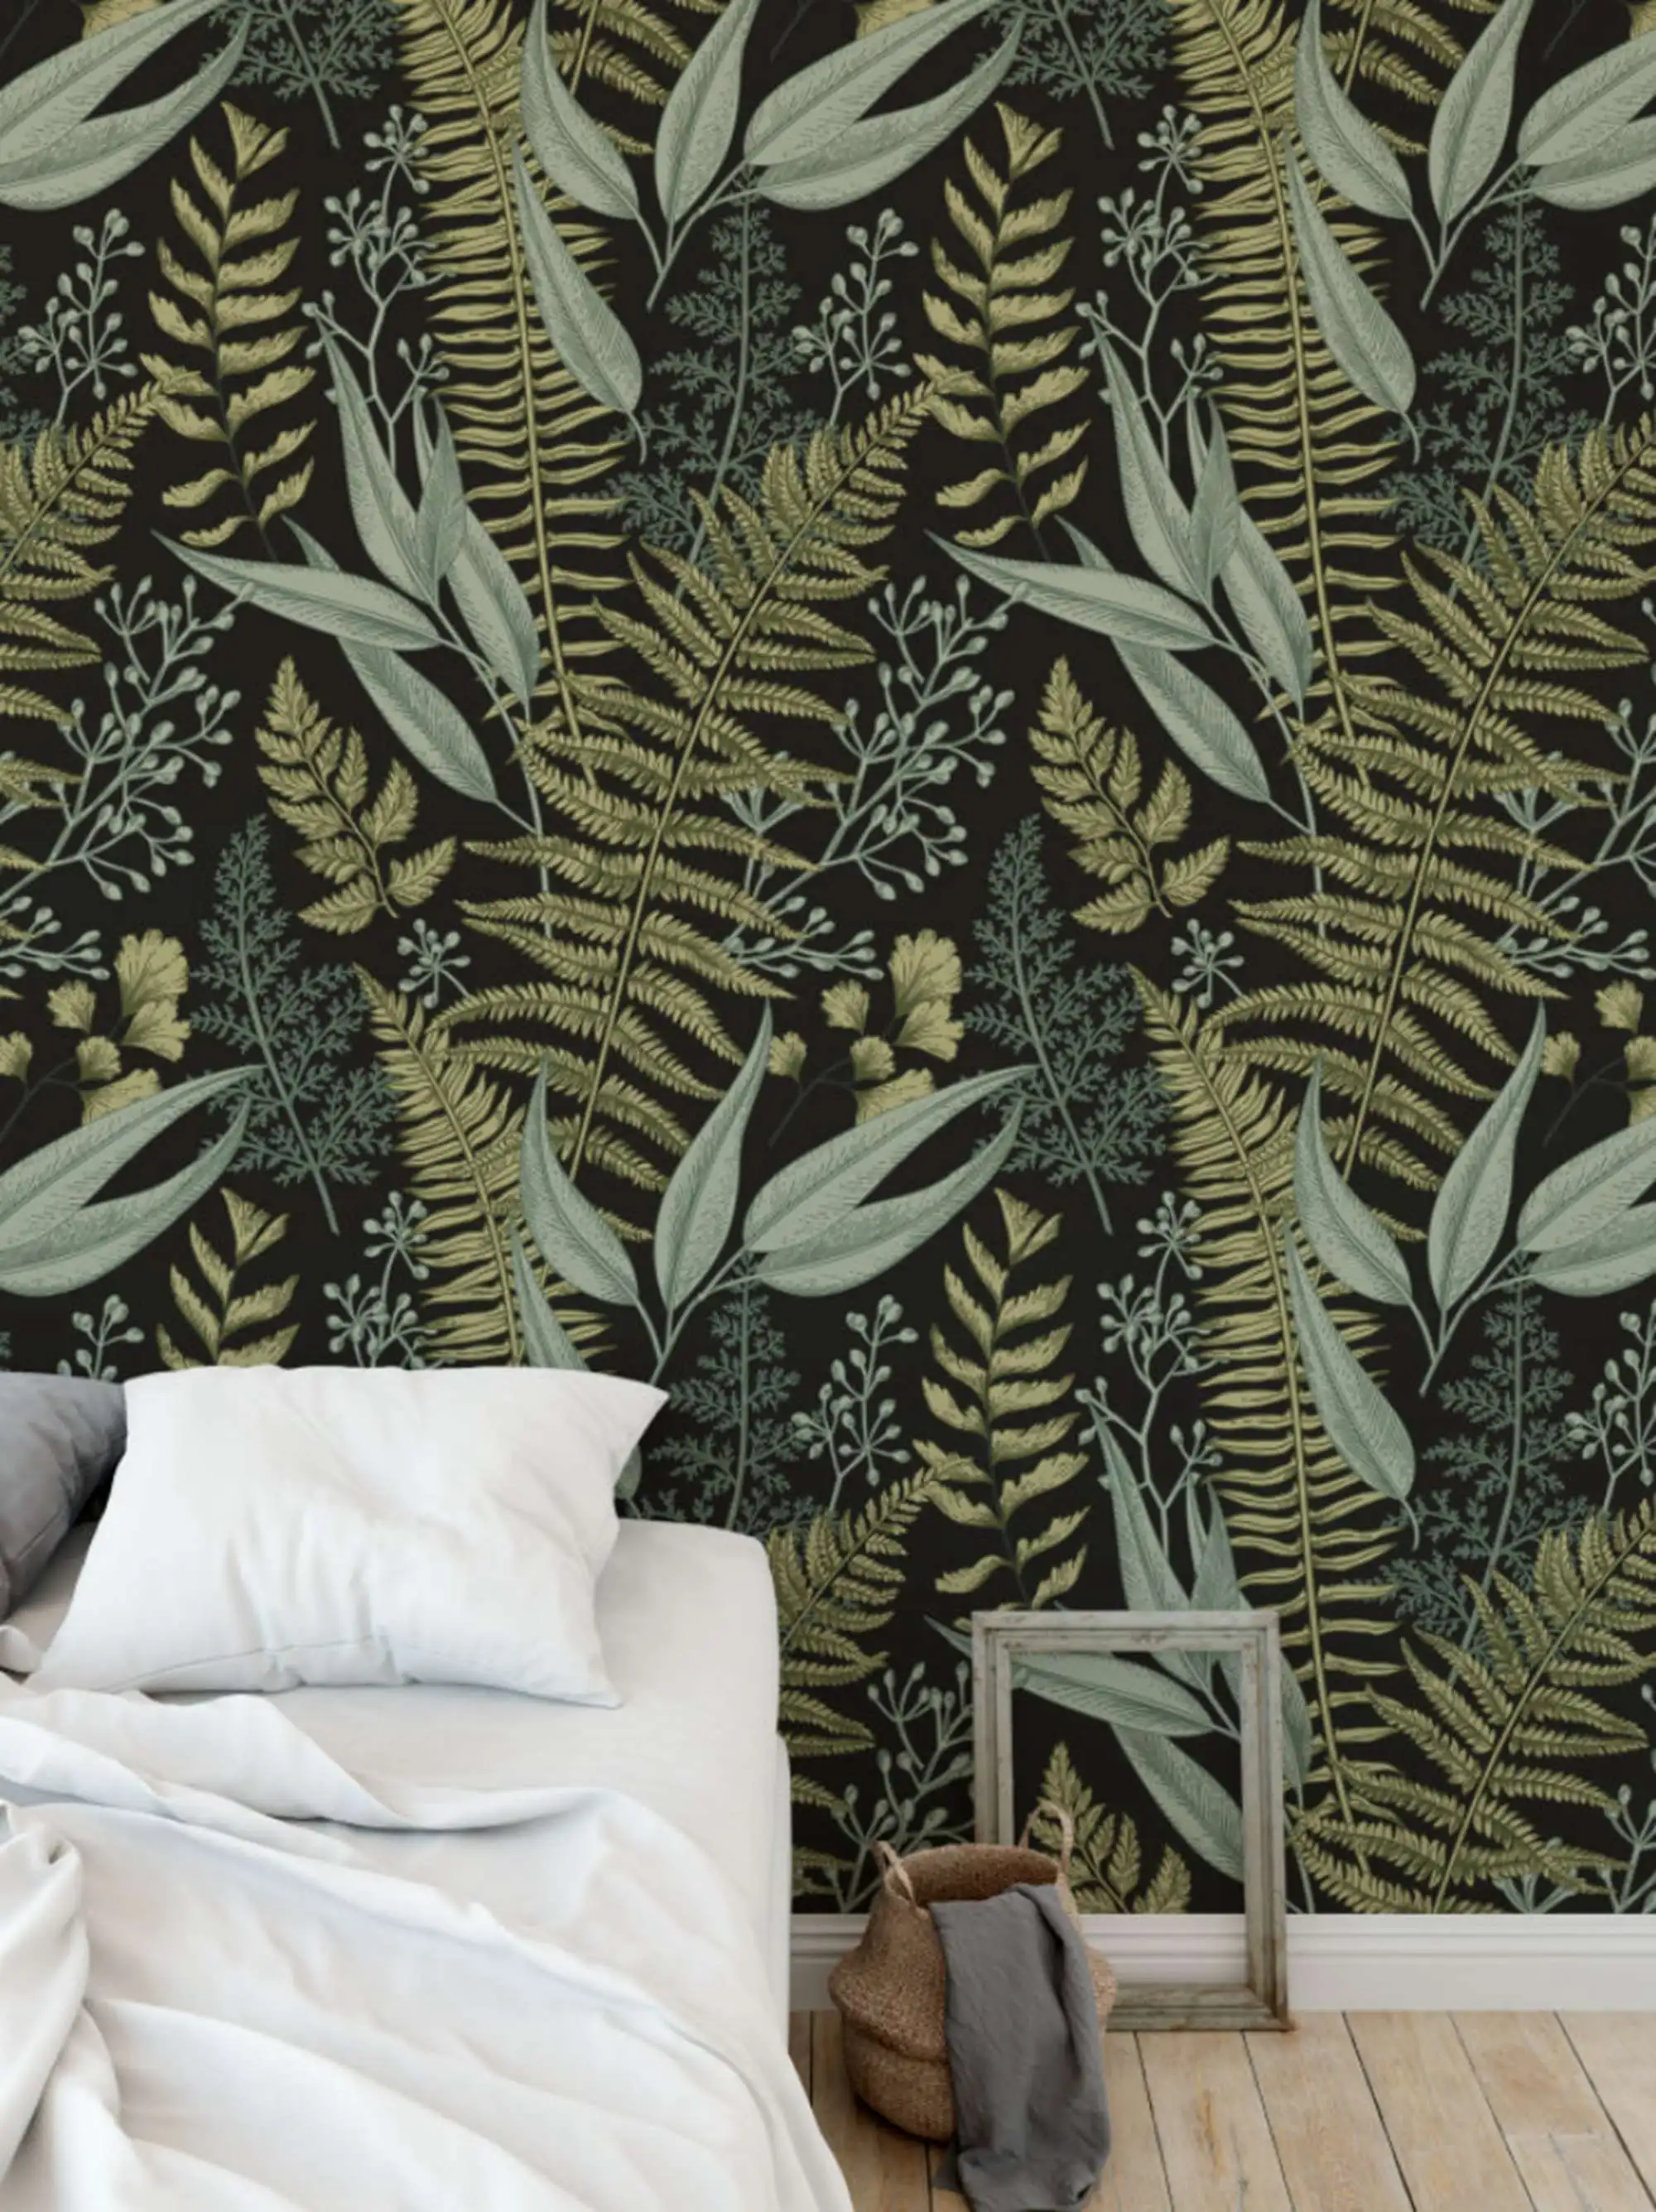
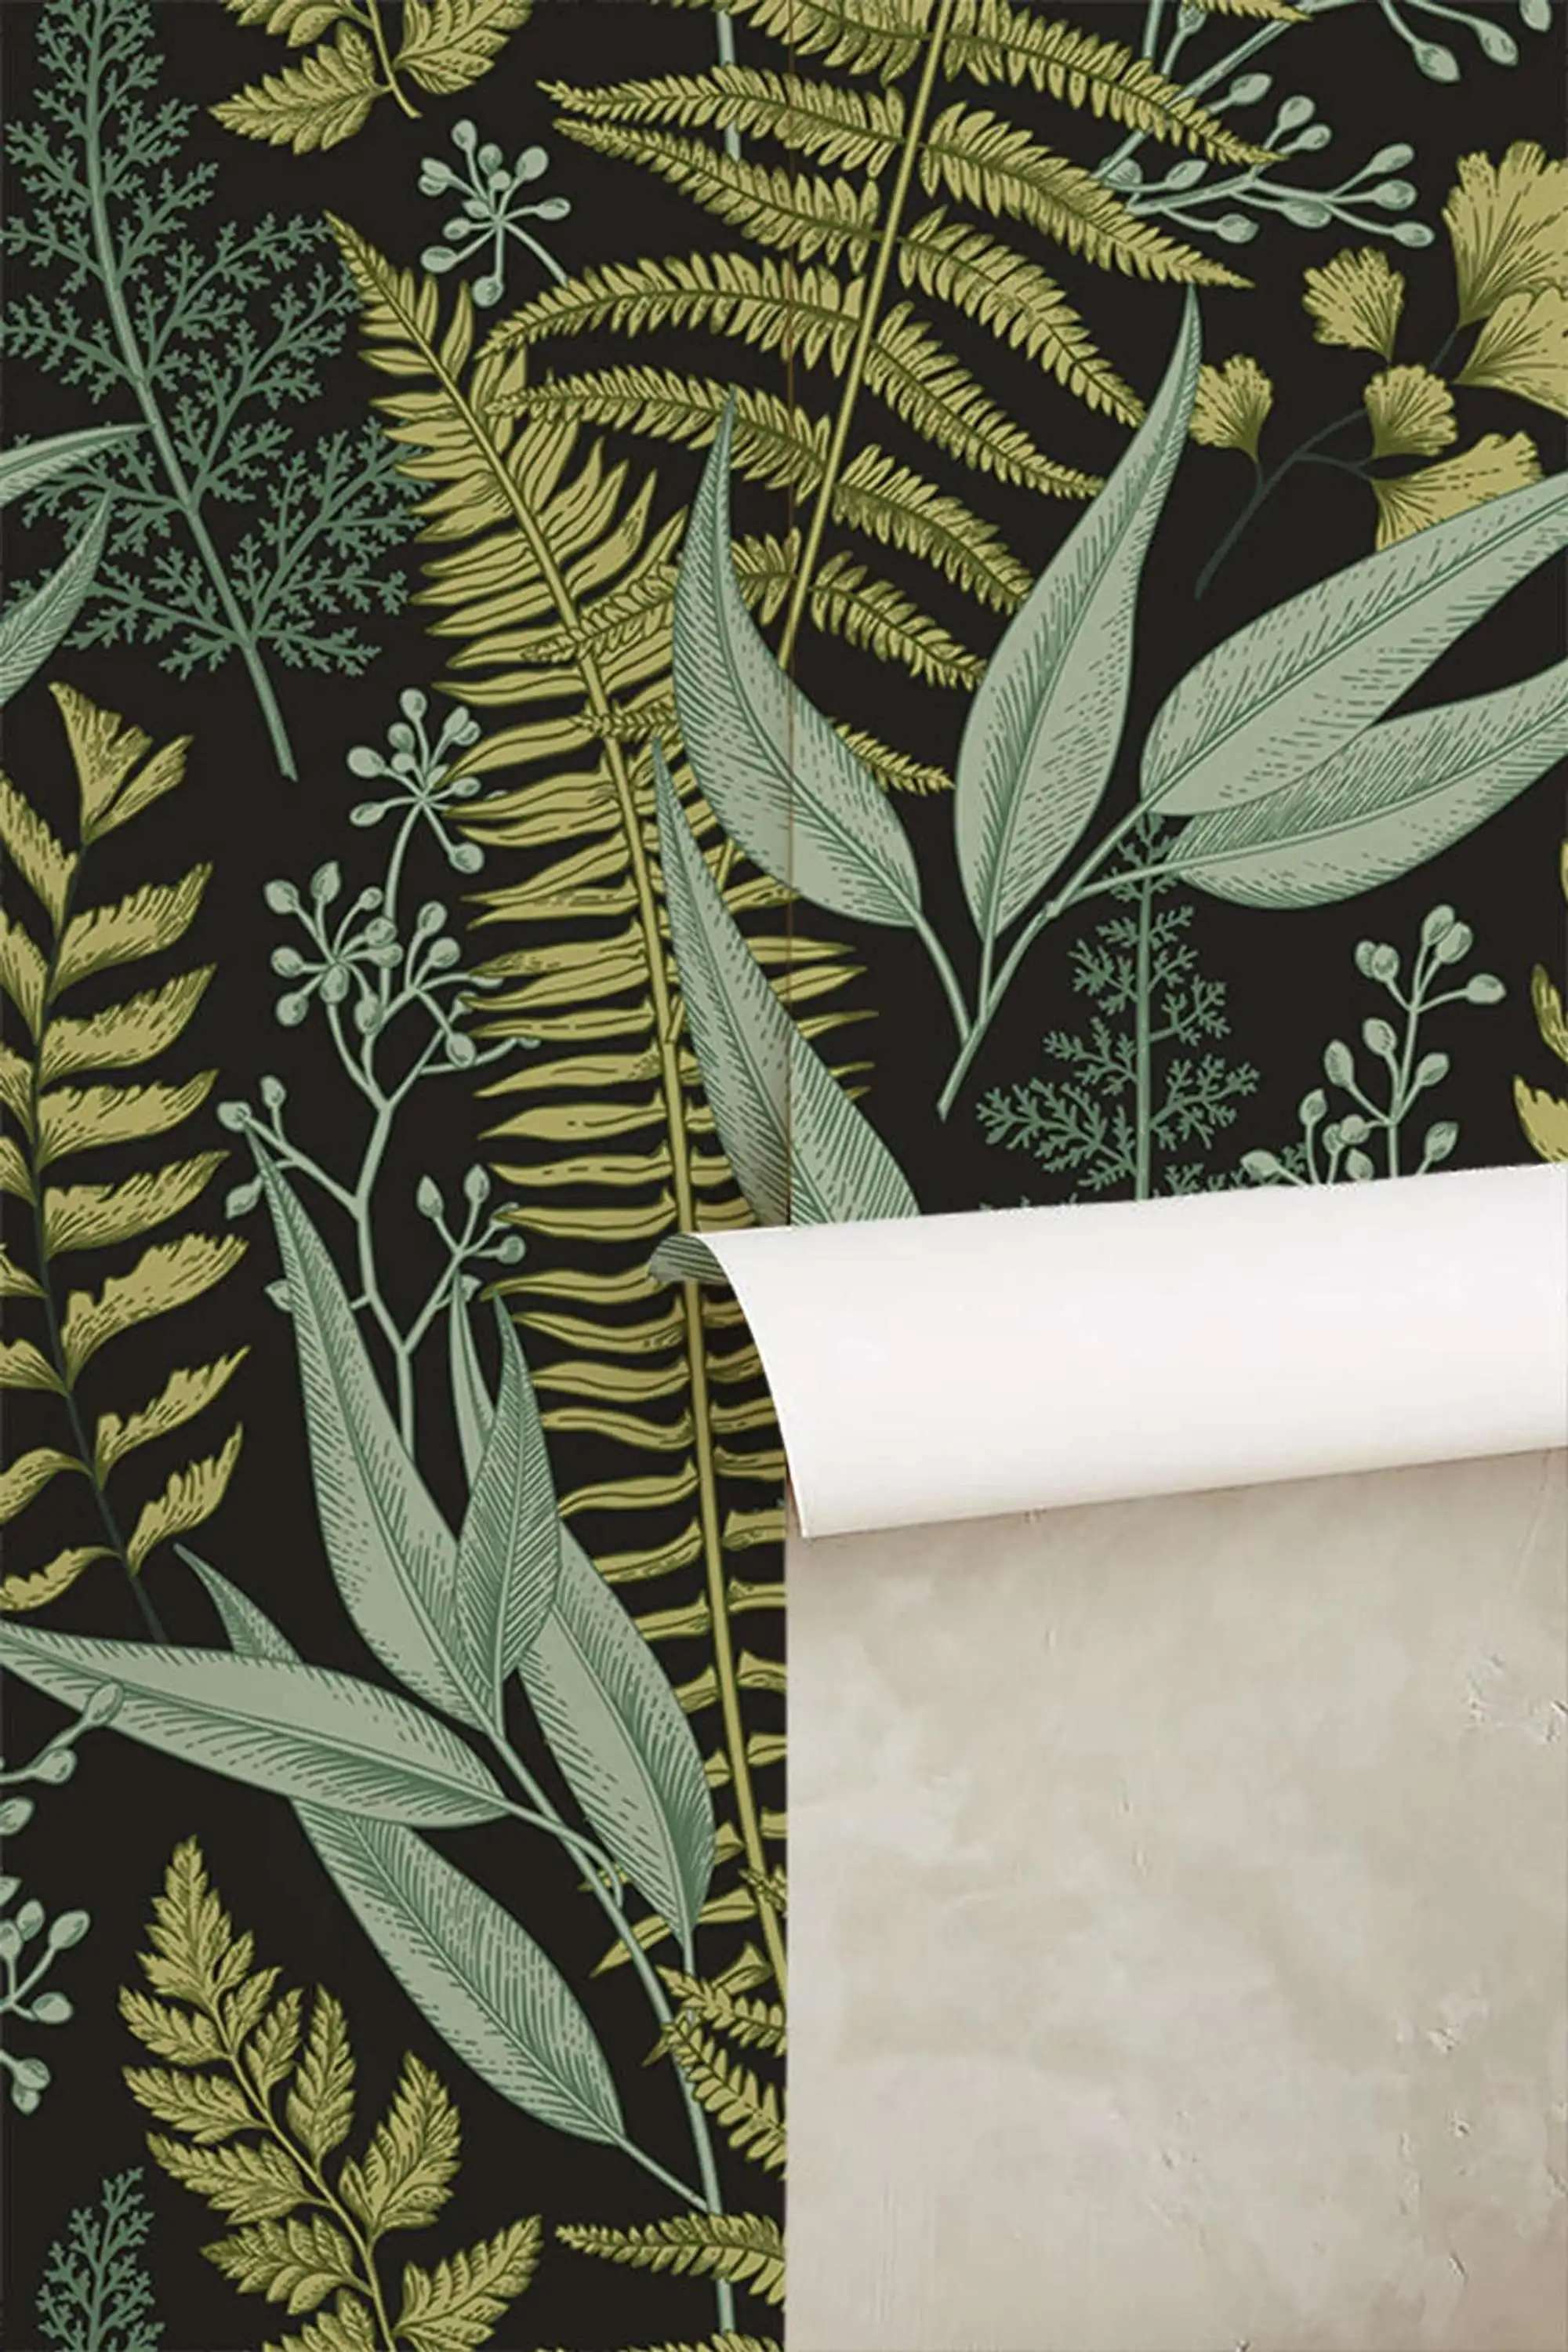
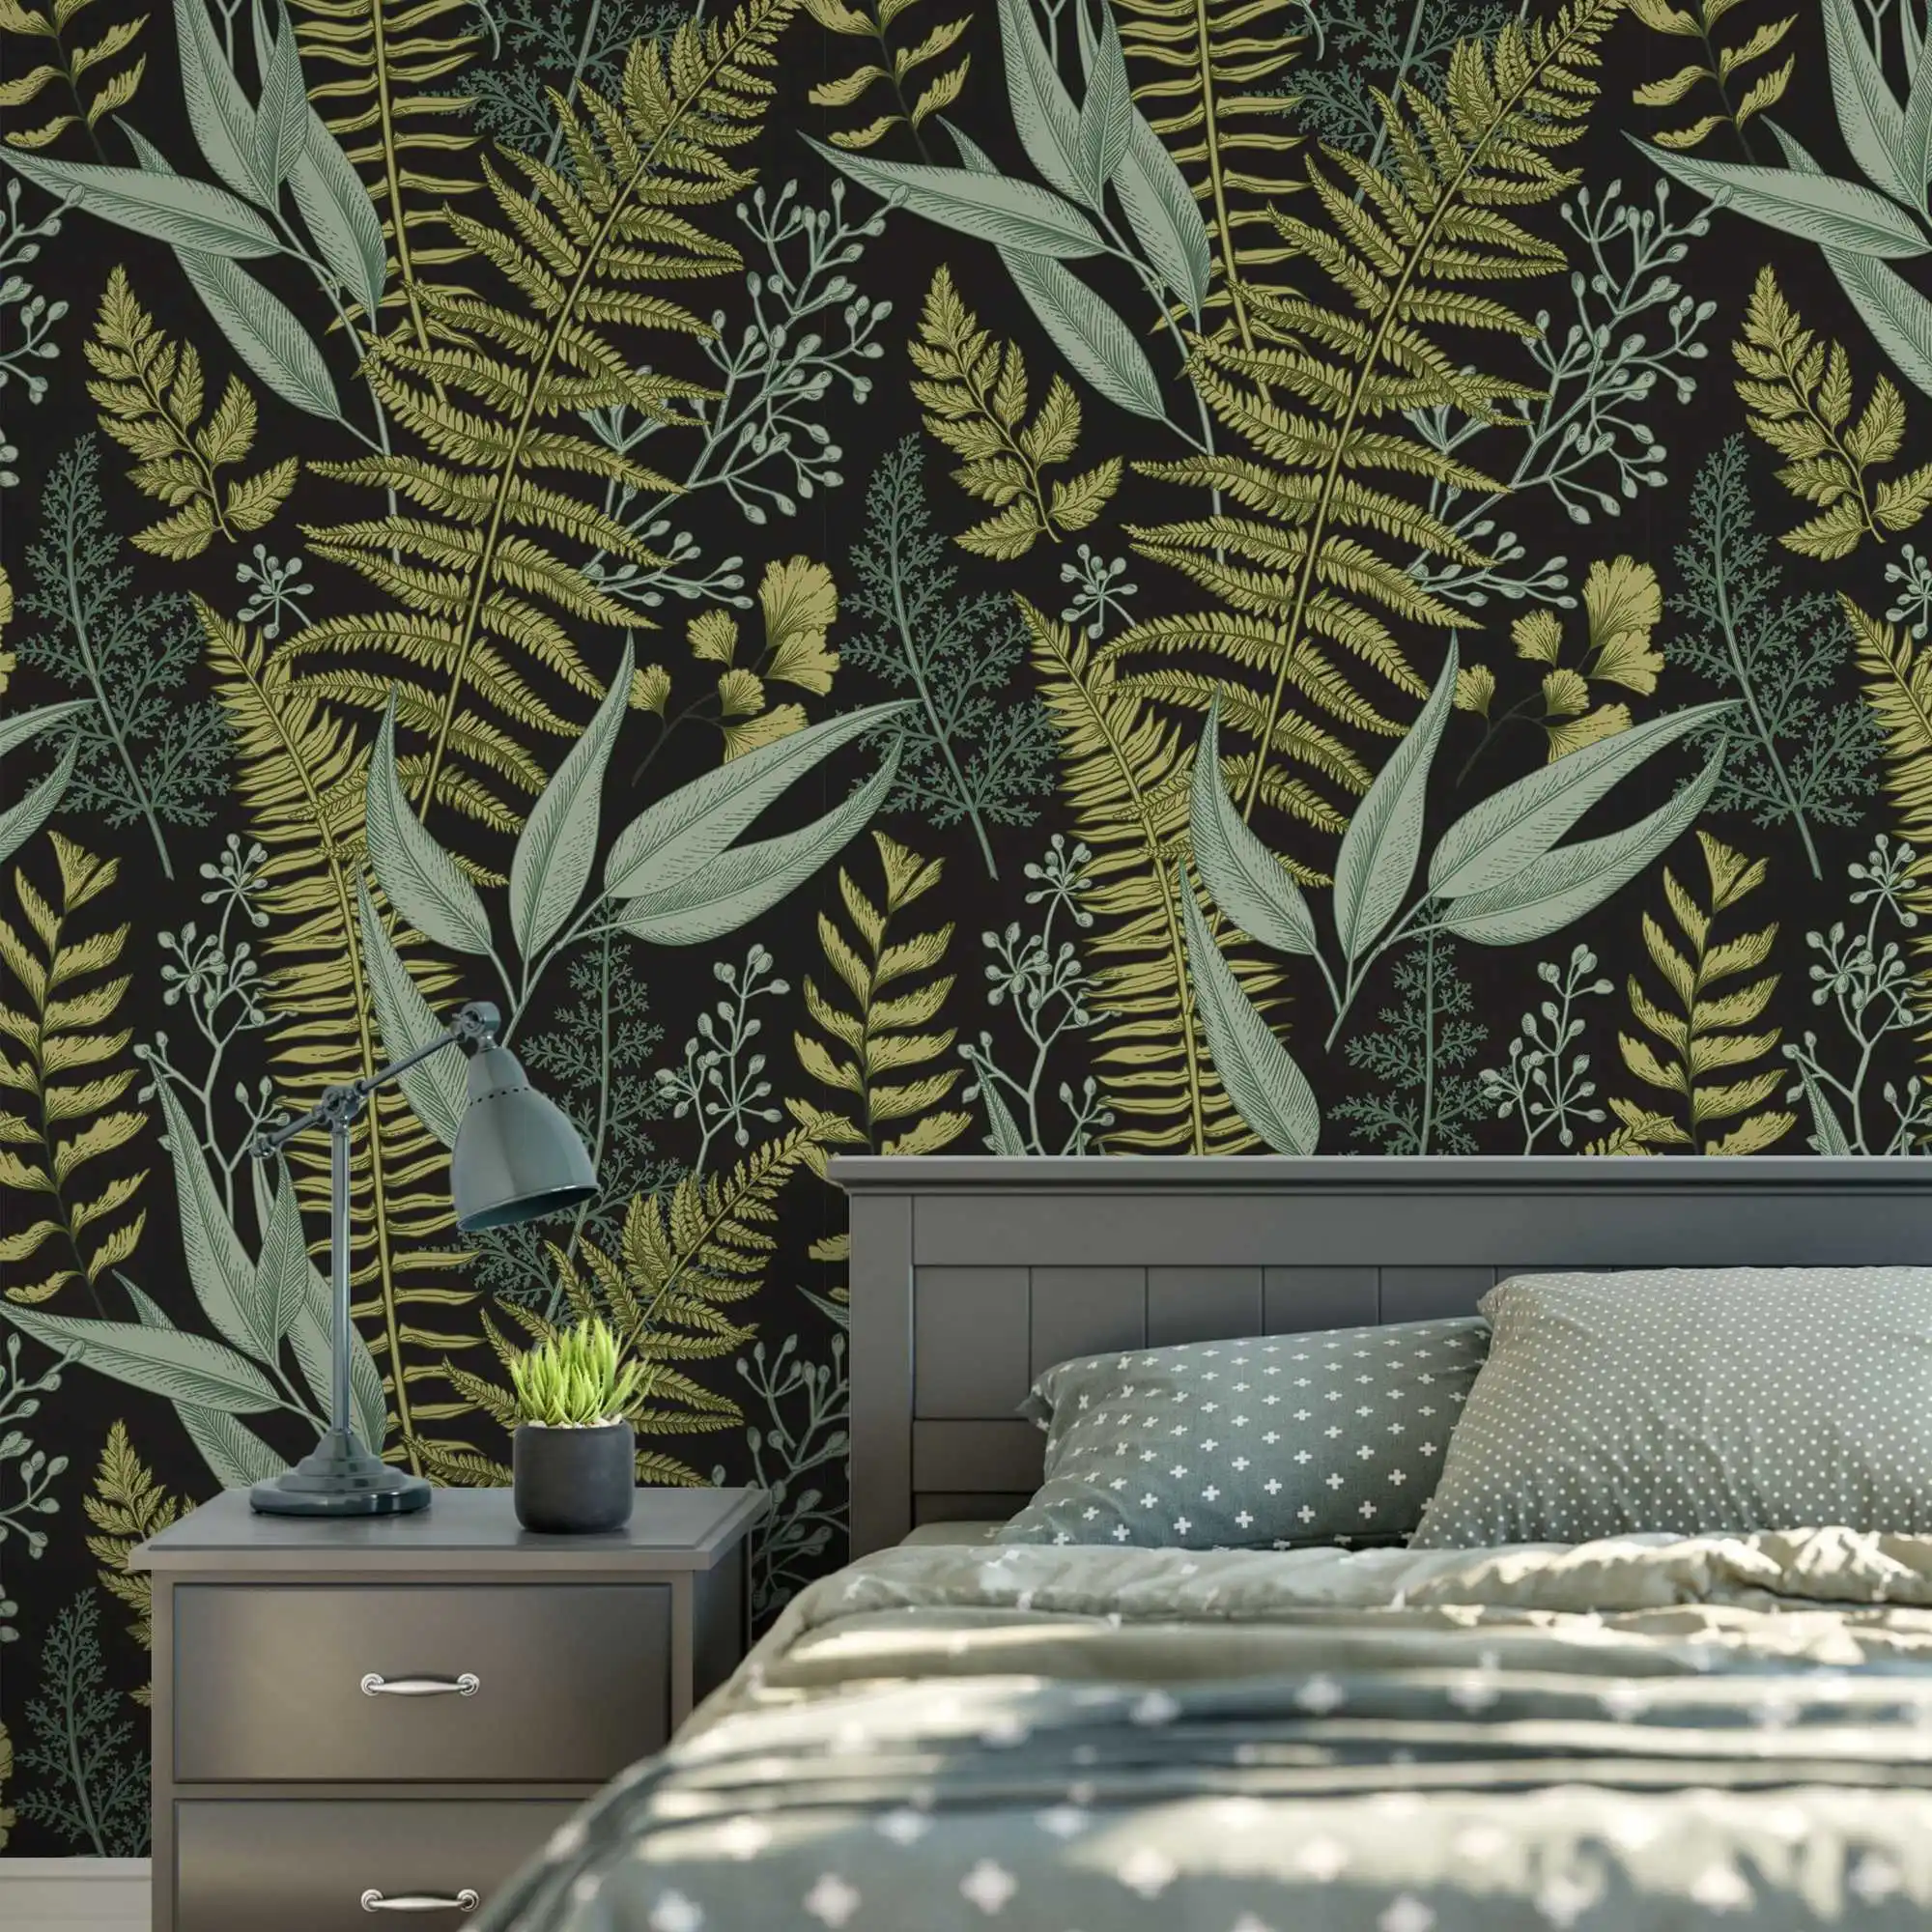
Описание товара


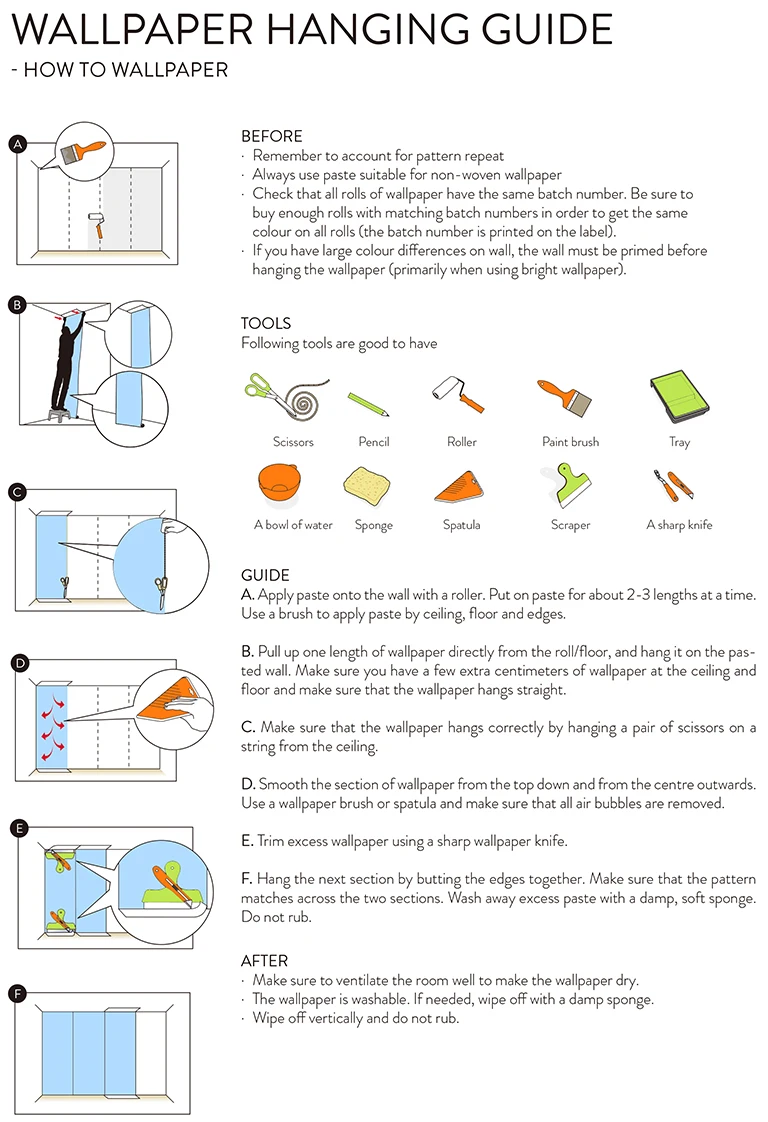
STEP 1: Prepare the wall surface
Your wall must be completely flat, clean and dry. Levels rough surfaces, rough, holes and uneven spots. Your wall should be a uniform color. If not, you may notice differences in color on your wall once installed. If your wall has multiple colors, we recommend that you paint again. Make a vertical line with a plumb line on the left edge of the area you want to cover with the mural. If you have a plumb, one can make your own by tying a heavy object on the end of a rope. This line is very important because it is the guide to start placing your mural.STEP 2: Prepare the wallpaper
The wallpaper panels are made with a width of 48.7 cm(19.2"). Panels are received printed continuously on a roll and numbered at the top. Cut independent panels and do a preview on the ground following the numerical order from left to right. Measure with a meter the height of your wall. If it's less than the photomural, you must cut it to fit properly. Do it while you have it on the floor but leave a margin of an inch to correct any differences in level on the wall.STEP 3: Prepare the glue
You may buy the glue from your supermarket, confirm it's for non-woven wallpaper use. Prepare the glue following the instructions on the bag of the glue you bought. Do it slowly. So you will obtain a uniform mixture and without bubbles.STEP 4: Attach the paper to the wall
Applying glue on the wall evenly using a brush or a paint roller. Start distributing from the line you marked as a guide to the plummet. Don't paste the entire wall, do it only in the area that will cover the first panel on the left, leaving a few inches outside the right. Apply the first panel of the mural on the wall starting at the top left. Check that is aligned with the guide. Presses against the paper with a dry roller or sponge to remove any air bubbles. Place the following panels in the same way in numerical order. The panels must not be mounted on each other but are set on edge. Clean the excess glue with a damp sponge.STEP 5: Finishing
With the help of a ruler and a cutter, adjust the sides and the top and bottom of the wall if necessary. Let dry 24 hours; you will get a perfect final result

Заказала эти зимние ботинки из плюша для своего сына, которому уже полтора года. Ботинки оказались как раз с запасом на... Читать отзыв полностью...

Лёгкая и просторная кофточка. Очень удобная, материал приятный к телу. Советую любительницам женственно го и элегантного кроя. ... Читать отзыв полностью...

Для моего ультрабука Hp Pavilion 15.6 дюймового эта сумка хорошо подошла. Мне понравилось качество сумки, можно туда же положить зарядку... Читать отзыв полностью...

Решила своему мужу на день Святого Николая сделать хороший подарок и подарить трусы из хлопка. Мне понравилась эта модель трусов,... Читать отзыв полностью...

Скоро зимние праздники наступят и я нахожусь в поисках подарков моей жене... Думаю, что эта сумочка моей жене должна понравиться.... Читать отзыв полностью...

Как увидила, сразу заказала! Очень давно искала себе такую красоту. Все не могла найти себе тот который прямо будет по... Читать отзыв полностью...


Всё идеально !Теперь у меня есть новые замечательные часы !))Только сегодня забрала их..очень эффектные и красиво смотрятся на руке ))вживую... Читать отзыв полностью...